Thursday, March 17, 2011

Second skirt

I successfully made another skirt out of silk using the same pattern I used to make this skirt. I really liked how it turned out. I will be giving it to my sister for her birthday present tonight.


I have another yard of fabric to make another one, this time in polka dots. And I will definitely be keeping that one :)

Wednesday, March 9, 2011

A Fun Spring Skirt

I've been wanting to make some new skirts for quite a while now (most of the ones I currently own I've had since high school). I found this really easy tutorial and tried it out. The pattern suggested using a lighter fabric for the skirt, and doing it in two layers. I had a bunch of thicker cotton that I got from my mom, so I used that. Instead of making it with two layers, I just cut it down to one.

I had some "help" measuring the fabric.

To make up for the top of the skirt requiring two layers, I took a small strip and sewed that to the top of the skirt piece. This way I could create the elastic casings, but be able to skip out on all the bulk.


Here's how it turned out!!


It's very full, haven't quite figured out what to wear with it yet, but it's very fun and perfect for spring (if it ever gets here). Threading all the elastic through all the casings took awhile, and made for some sore thumbs, but once I started doing it I figured out a method. All-in-all, not too bad. And it's with an easy to wear elastic waist (and no zippers to sew!!). I intend to try out this pattern again using a silk-like fabric in the near future.

Thursday, March 3, 2011

Dress for friends' wedding

Madelyn was in our friends' wedding this last weekend. All the little girls (there were 6 girls, 8 kids all together) were supposed to wear a white dress with a blue ribbon around the waist. I bought this dress off of eBay, and did some altering.


I took off the pink bow, which was sewn into the side of the seam. Once I took it out, I had to sew it back up. I used my seam ripper to take off the pink ruffle along the bottom, then hemmed the layer. I wrapped the blue ribbon around the waist and sewed it onto the sides of the new dress, and tied it into a bow in the back.


I might leave the ribbon on, I like the blue and white combination, or I might end up changing it if Madelyn wears this for my sister's wedding.

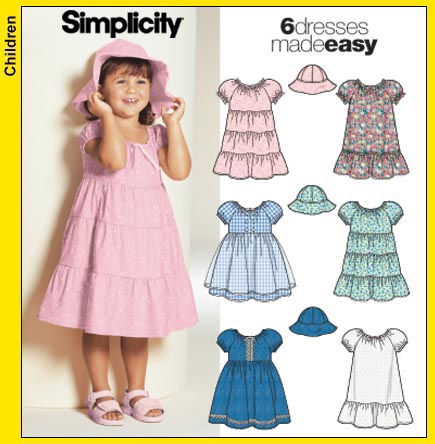
New Dress for Madelyn

I bought this pattern during a 99 cent Simplicity pattern sale at Joann's awhile back.


I got the fabric on clearance at Craft Warehouse. Yesterday I finally got the chance (and motivation) to put it together. I was very happy with how it turned out. I'm still not sure how the sizing for kids go, I made this one in size 1, and even took it in a little on the sides, but it still turned out pretty big. Oh well, at least she can wear it for awhile.


I hadn't intended to make the dress with the ruffles on the neck and sleeves, but I didn't follow the directions correctly and made them anyway. But I'm glad I did, because I like how they turned out.


I love the back view with the tiers of the dress. I just might have to make another one of these, or another variant of the pattern. It was pretty easy, and I only had to use my seam ripper once!!  

Monday, February 7, 2011

Fabric Blocks

I made these a while back to go in Madelyn's room. I used different scraps of fabric and cut out a bunch of 6 inch squares. Then I sewed them all together, stuffed them with some leftover batting, and set them up in her room.


I really wanted to have the orange minky fabric on all three, but only had enough for the two. 

More Hair Barrettes

Madelyn napped for 3 hours today!! So I got quite a bit of playing done :)
I made the first two from some material from a couple of shirts.


The last three are from roses I made out of felt following this post. They were pretty easy to make (I cut all the shapes yesterday while I was "watching" the Superbowl).


Can't wait to wear them!!

Mei Tai Baby Carrier

A friend of mine purchased one of these styles of baby carriers online and used it with their first child. I loved the idea of "wearing" your baby, for both the convenience factor and the benefits for the baby. I purchased a Moby wrap, but wasn't really a fan of it. It always felt too loose, and was a pain to put on. I looked up some of the Mei Tai style carriers, but to purchase them, you would have to pay upwards of $100. After perusing the Internet, I found this tutorial. The materials for the one I made were only around $30, and it wasn't that difficult to make. I also got to pick out my own colors, and make some custom adjustments.


This is a picture of me awhile back wearing the carrier. The Mei Tai consists of a panel in front where the baby sits, with one set of straps that tie around your waist, and one set that goes over your shoulders, cross in the back, goes around the front, then ties in back. It takes a little bit of practice, but is much easier to use than the Moby. I loved this carrier, it was a life saver. It enables you to walk around and get stuff done while your baby is close to you, and you have your hands free!! Madelyn loved to sleep in it, the constant movement is very soothing to new babies. I would highly reccomend this style of carrier to any new mother.