Thursday, May 24, 2012

Little Owl

I really got into crocheting again a few weeks ago, and made a few different little animals as gifts for some of the little kids I know. This little owl I made for Shelby for her first birthday.


The pattern is found here. I altered it a little bit, making smaller circles out of yarn for the eyes rather than using plastic eyes (since I didn't have any eyes the correct size at home and didn't want to make a trip to the craft store) and added a few eyelashes to make it a girl owl. I also didn't sew on the feet (started to, but it looked weird, so I went without). 

Tuesday, April 24, 2012

Playful Ripples Throw

Finally finished this afghan!! I started it last December sometime, but never really got around to finishing it because I got distracted with other crochet projects. Audrey is finally liking the swing, which gives me some free time 
(and free hands, crocheting and nursing do not go together). 

This pattern was a pretty easy one to do, and I liked how it turned out with the bright colors, but all the color switching was kind of annoying, and the "weaving in the ends" part at the end took forever. I like patterns with lots of colors, but they are a lot more work.


The edges turned out a little jagged, so I edged it with a line of single crochet to even it up.


I made this afghan for Madelyn, she was excited when it was done.


The afghan didn't end up being that big, but I think it turned out to be the perfect size for her.

Crochet Owl Purse

 Actually got a crochet project done, post-baby!! This was a quick little project to do, found it off of Pinterest. The link to the actual pattern is here.

I added on two additional rounds, since I tend to crochet tighter than most people, and I wanted Madelyn's hand to be able to fit inside. 


Here's Madelyn modeling her purse.


I had her put some money in it, told her she can use it to put her offering in for Sabbath school. She thought that was a good idea :)

Thursday, January 26, 2012

Waterproof Bib

 I purchased this waterproof bib for Madelyn awhile back. The brand is called Tidy Turtle, and it's the best bib I've ever used. They're kind of hard to find, I bought this one at Fred Meyer, but have never been able to find another one. I just tried looking it up online, and it looks like you can buy it on Amazon now for $9.99. Awhile back I would have ordered one, but just recently my husband asked me,
"Why don't you just make one?"


Why not?

Joann's just recently started selling PUL fabric, which is a waterproof, wipe able fabric that is usually used in making diapers. It was on sale, and I ended up getting the end of the bolt, so I have about a yard that I got for under $10. I'm going to be able to make a bunch of bibs with all that fabric, I will probably be making some for all our friends who are having girls this year.

The materials I used for this project included:

PUL fabric
Paper to trace out bib pattern
Extra wide double fold bias tape in contrasting/matching color to fabric
Snaps
A tool to attach the snaps (I bought a pliers kit, with my 50% coupon, worked pretty well)

First off, I traced the existing bib on some extra-long paper (it was too small for normal 8 1/2 x 11).


The bottom part of the bib has an ingenious pocket that catches all the crumbs. It's doubled over, so the pattern can be seen from the inside of the pocket. I made sure my pattern did that too.


The old bib with my new pattern right next to it.

Once I got the patterns cut out, I traced them onto the fabric and cut it out. One tip with working with PUL fabric is that you have to be careful with making pin holes. Once you make a hole, it's there forever, so you don't want to pin the pattern to the fabric before cutting it out.  


Before putting the pieces together, I folded the pocket portion of the bib in half and ironed it. You can iron ONLY on the fabric, or printed, side of PUL fabric. If you iron on the back, it will probably stick to your iron. When ironing it in half, the two pieces ended up laminating themselves together, which was kind of unexpected, but worked out okay.

I then placed the pocket onto the main body of the bib, and started pinning the bias tape around the outside. This was the longest and most time-consuming part. I went around the outside first, then cut the tape, then used a new piece to go around the inside. 


After a quick trip through the sewing machine, I used the pliers to attach the snaps onto the upper corners. My husband was supervising, and I will admit I would have put the snaps on backwards if he wasn't watching me :)


 Close-up view of the snaps. Once I figured out the pliers, it worked pretty well.

All-in-all, a pretty quick and rewarding project. I think factoring in the supplies I used (not counting the pliers) this bib ended up costing me maybe $3? Not too shabby :) I will definitely be making more!!


Friday, December 30, 2011

Christmas Cards

Kind of a last minute project I did was to make my family some Christmas cards with the help of my little girl. We had fun!!


Following an idea I got off of Pinterest, we made Christmas trees from Madelyn's feet.


We dipped her finger in red paint to add the decorations. I also used a foam paint brush to add some branches to it. Madelyn got a kick out of having her feet all green, we'll have to do more painting projects in the future.

Baked Goodies

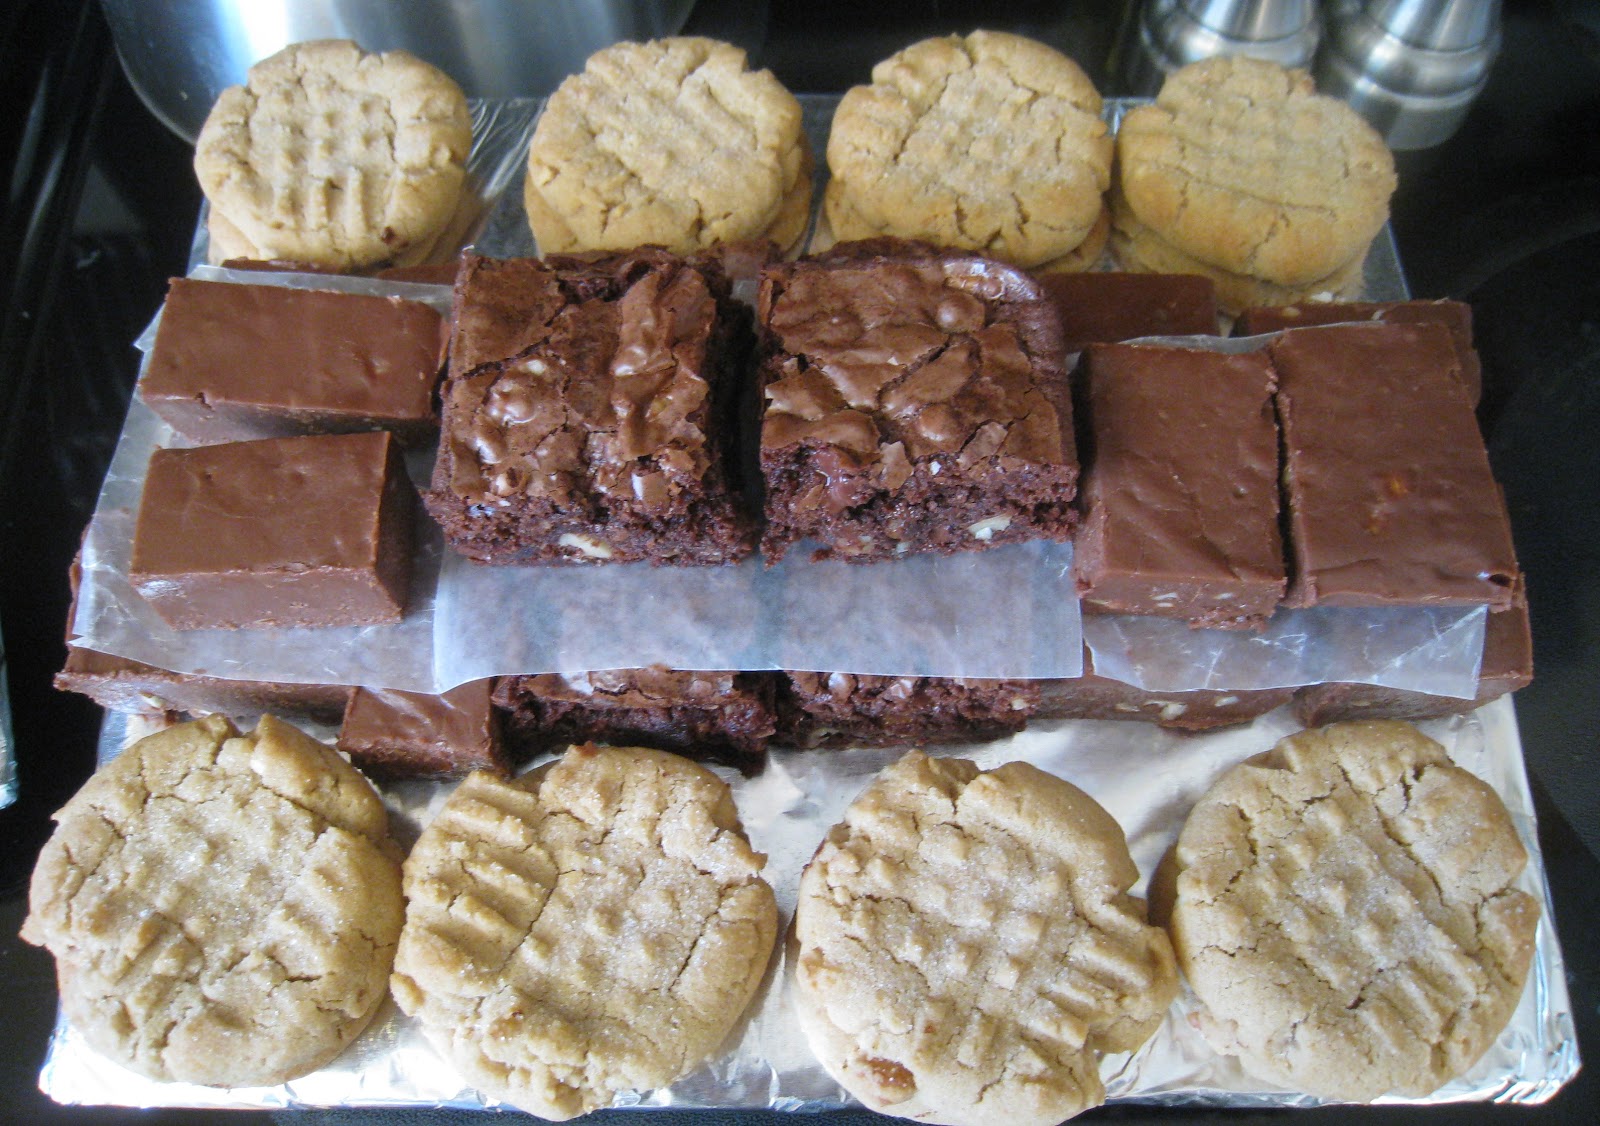
My goal this Christmas was to handmake/bake every gift I gave. I succeeded!! I made crocheted items for my mom, sister, mother-in-law, and sister-in-law. But since I figured my brother-in-law and dad probably wouldn't appreciate a crocheted scarf, I decided on the baking option :)

I made 3 different items, two of which I sampled (since they didn't have dairy).

  1.  Ghiradelli brownies (which are dairy free !!!! but do have egg).
  2. Peanut butter cookies (which use shortening instead of butter, but again have egg).
  3. Fudge (packed with dairy, got the recipe here).
Got it all packaged nice and wrapped a big bow around it.


Told my brother-in-law and dad to hide them from my mom and sister, not sure if they did or not :)

Purple scarf that turned into a cowl

This project was my Christmas gift to my mom. It was supposed to be a scarf, as in this picture.


I got the pattern from this website. It was my first "intermediate" crochet pattern, and although it did take some deciphering at the beginning, I was able to figure it out without too much trouble. The pattern was really neat, it created "strawberries" up the length of the scarf in the stitches.

I was intending to make it scarf length, but this project was unfinished when my hand started hurting, so I decided to cheat and shorten it into a cowl. I liked how it turned out cowl style actually, it was starting to get too thick for a full-length scarf.


This picture you can kind of see the "strawberries."

This was a fun pattern to make, it was neat to be able to make something with more complicated stitches.